|
<< Click to Display Table of Contents >> Client Total Invoices Report |
  
|
|
<< Click to Display Table of Contents >> Client Total Invoices Report |
  
|
Overview:
The Client Total window will select all the invoices for a selected period. This data can be viewed or printed to a report by the total amount of the invoices for the clients, or select a client to display all the invoices for the period for that client. The invoices can also be viewed by Division, the Sales ID code, or Employee Code. This feature is password protected, so the user will need to have the permission and a special password set-up in the ‘Employee Details’ window. (See: Setting up Password and Permissions for Protected Functions)
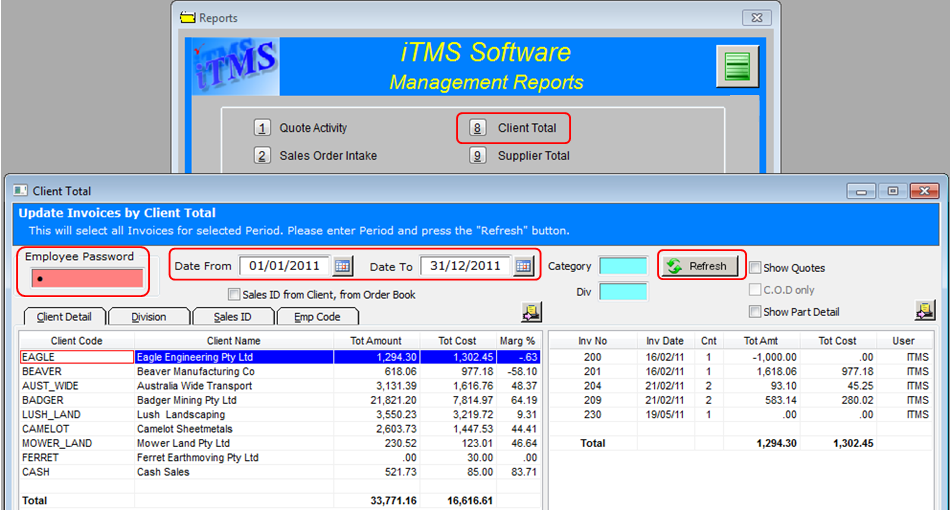
To access this feature, open the Reports module, and click on the ‘Client Total’ icon. Enter the password and select the required date period by either typing in the dates or click on the Calendar buttons and select date, click on the Refresh button. The window will display on the left side, all the clients that had been invoiced during the selected date range and the total amount invoiced. The total cost and the margin will also be displayed. The report can be customised by selecting the tick box options or by filling the “Category” or “Div” (Division) fields. To view the all the invoices for an individual client - dbl-click on the required client. All the invoices for that client will be displayed on the right side of the window.

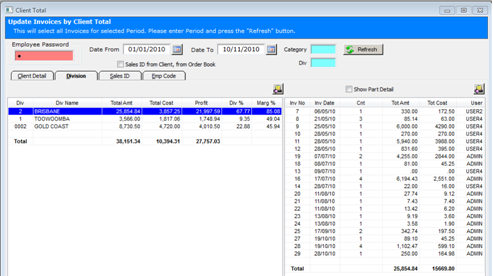
Click on the “Division” tab and dbl-click on a division to view the invoice total amounts by individual divisions.

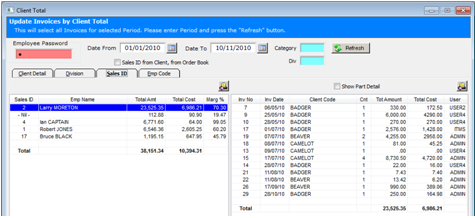
Click on the “Sales ID” tab and dbl-click on a Sales ID no to view the invoice total amounts by individual sales person.

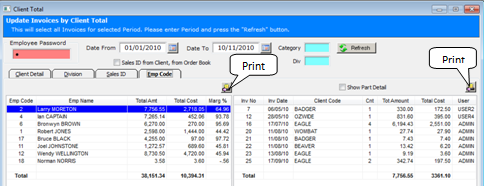
Click on the “Emp Code” tab and dbl-click on employee number to view the invoice total amounts by individual employee.

All the lists in this window can be printed by selecting the Print button located at the top of each of the tables. When the Print button has been selected the Print Table Data window appears, to print or preview the report – click on required button. The table data can be exported to a different format, or emailed by selecting the appropriate radio buttons or tick boxes. To export or email the table data, click on the “Printer Settings” tab and select settings.

Select required format and/or options from the available radio buttons and click on the Preview button, the ‘Save As’ window appears. Browse to select the location to save the report and ensure to add the correct file extension on the end of the file name. Example – iTMS Report.pdf. Click on the Save button, if the email tick box was selected, an email will be generate with the report attached in the selected format. Print the saved report o send email as normal. Close the Client Total window when finished.
Last Revised: 22/11/2011 SJ