|
<< Click to Display Table of Contents >> Kit Purchasing |
  
|
|
<< Click to Display Table of Contents >> Kit Purchasing |
  
|
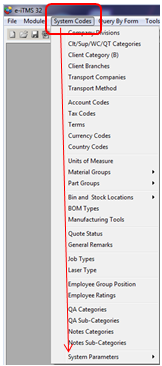
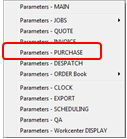
To enable the Kit Purchasing feature to operate correctly a box must be ticked in the ‘Parameters – PURCHASE’ window. Click on ‘System Codes’ on the toolbar and then click on ‘System Parameters’ on the bottom of the drop-down menu. The menu will extend will appear, click on 'Parameters -PURCHASE'.


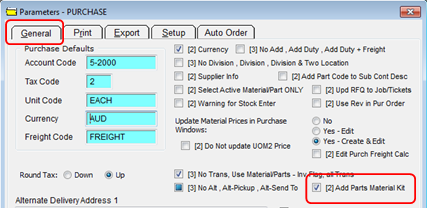
The Parameter window opens, click on the “(2) Add Parts Material Kit” box to tick, press <F9> to save. (See below)

If a part is not already in the system the user will need to create a Part, and add purchased materials that are included in the Kit. Part must be non-inventory and ticked as Kit.
Note: the Purchased materials must be from the same supplier.

Add materials in the “Build” tab to main assembly part (Kit Part – Not for Stock).
Open New Purchase Order, enter supplier code, press <TAB>-
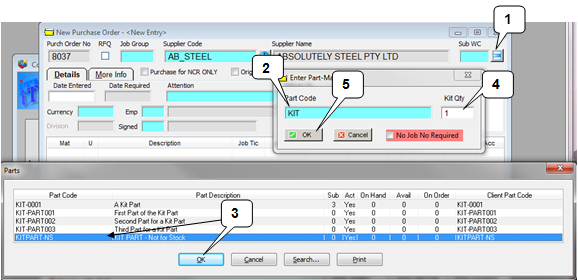
| 1. | Click on the icon as shown below to display the ‘Enter Part-Material Kit’ window. |
| 2. | In the “Part Code” field, type in the prefix for Kit parts, press <F2> to display the parts list. |
| 3. | Click on the required Kit Part on the pop-up list and then click OK. |
| 4. | Adjust “Kit Qty” and then |
| 5. | click on OK. |

Materials will be automatically brought into the order window. Complete the “Signed”, “Currency”, and “Emp” fields. Click in the “Job Tic” field, press <F2> and select the job ticket from the Jobs pop-up list and then click OK.

A message pane appears

Click on Yes, the job tickets have been added.

Check quantities and remaining details, save order by pressing <F9>. Receive materials as per normal - Note: Materials received are not recorded as stock. The user will need to manually add Kit Parts to stock if required to record movements or view current on hand.
Last Revised: 04/04/2012 SJ