|
<< Click to Display Table of Contents >> Edit or Resolve a Notes Record |
  
|
|
<< Click to Display Table of Contents >> Edit or Resolve a Notes Record |
  
|
Overview:
Notes Record issues need to be addressed once the record has have been raised. The employees responsible for the quality process will action and/or resolve the raised record/issue in line with correct quality procedures. The process will be recorded in the Notes Records which involves a number of steps;
| • | New Record is created and the issue is described |
| • | The issue is Investigated and appropriate action is identified |
| • | The Action is implemented to Resolve the issue |
| • | Issue is completed |
All the above is documented on the different tabs of the Notes Record.
To Edit/Action and Resolve a Notes Record
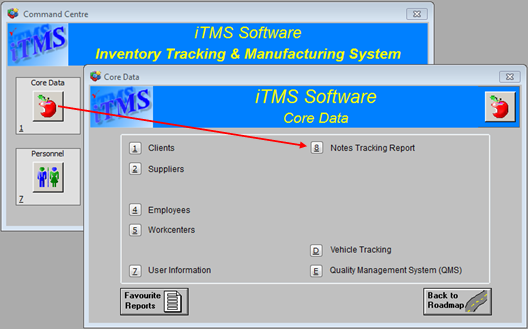
Open the Core Data module and click on the "Notes Tracking Report" option to view all note records.

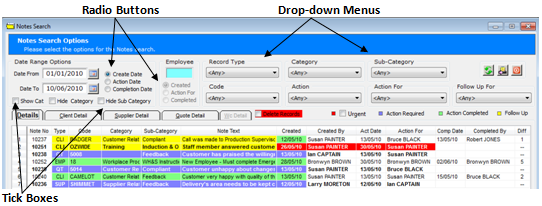
Enter the date range for your search in the "Date Range Options" fields. The dates can be entered by either typing the dates or using the "Calendar" buttons. Click on the Refresh button, to display all the notes in the system. The search can be refined by using the radio buttons, the "Employee" field, drop-down menus, or the tick boxes. The records are colour coded as to their progression through the resolution process.

Select the required record by either - Right-mouse click on the "Note No" for the required record and select “View/Edit Notes Record '00000'”, or Dbl-click on the "Note No" to open the record.

Click on the "Suggested Action" tab to open and type in the information in regards to this step in the resolution process. Press <F9> to save. Repeat the procedure to enter information on the remaining tabs for each step of the resolution process. Once the issue has been actioned and resolved, click in the "Completed By" field of a Note Record, press <F2> select name from the pop-up list and click on OK. Click on the "Resolved" tab to open and enter information in regards to the finalising of the issue, then press <F9> to save.
See example of each of the tabs below. The name of the tabs of the notes records vary due to each organisation’s preferences. To change the name of the tabs, please see ‘Notes Systems Set-up’ in the iTMS Help Files.

The Notes Record has been completed. The Print and Email buttons are only accessible after a record has been saved for the first time.

For this example the 'Follow Up' tick box ticked, this may be due to the company wanting to ensure all employees fully understand the new procedure. The record will be highlighted yellow in the search window until the “Follow Up’ tick box is un-ticked.
Last Revised: 10/02/2011 SJ