|
<< Click to Display Table of Contents >> Notes Tracking Report |
  
|
|
<< Click to Display Table of Contents >> Notes Tracking Report |
  
|
Overview:
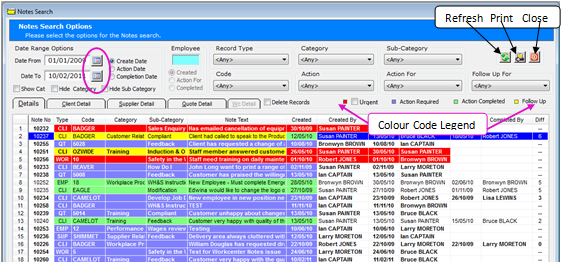
The "Notes Tracking Report" feature is a search function that allows the user to either, view all the Notes records, view only records for a selected date period, or the search can be refined by using one of the many drop down menus and/or tick boxes. All displayed notes are colour coded in relation to their status in the quality/resolution process.

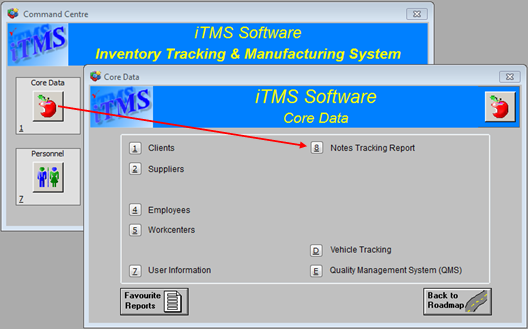
Click on the ‘Notes Tracking Report’ option to open the ‘Notes Search’ window. Enter the date range for the search by either typing in the dates in the “Date Range Options” fields or using the Calendar buttons (Circled below). Click on the Refresh button, all the notes records will be displayed in the window. The search can be further refined by using any of the "Radio" buttons, or drop-down lists. The records are colour coded as to their progression through the resolution process.

To view a Note record either - Right-mouse click on the "Note No" and select “View/Edit Notes Record '00000'”, or Dbl-clicking on the "Note No" to open the record.
The "Client Details" tab displays all the Notes records created from the 'Clients' window
The "Supplier Details" tab displays all the Notes records created from the 'Supplier' window
The "Quotes Details “tab displays all the Notes records created from a 'Quote'
The "Wc Detail" tab – Under Development
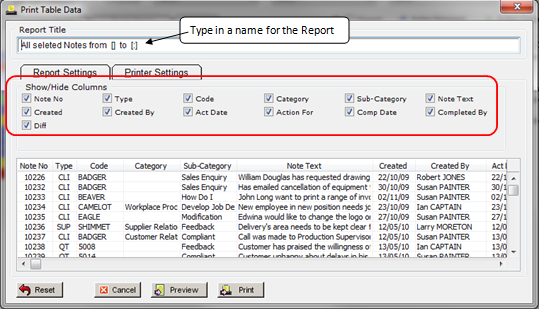
To print a report of the Notes Records, click on the Print button to open the ‘Print Table Data' window.

Type in the name of the report in the 'Report Title' field and show or hide columns to refine your report by clicking on the tick boxes. The report can be further customised by opening the 'Printer Settings' tab and selecting different options.

The "Printer Settings" tab enables the user to choose page layout, number of copies and the paper size for the report. Also the export format, whether to add or exclude report titles and/or Company Header, as well as if the report is be attached to an email. To make changes in this tab simply click on the radio buttons and/or tick box to activate or de-activate the option. The report title can be changed by clicking in the 'Report Title' field and typing in the required name for the report or list.
The Reset button enables the user to reset the default properties of the report or lists.
The Cancel button enables the user to cancel and close the "Print Data" window.
The Preview button enables the user to view the report prior to printing so any changes can be made.
The Print button prints the report with no further previews or options to make changes.
Last Revised: 29/02/2012