|
<< Click to Display Table of Contents >> Creating a New NCR / ECR |
  
|
|
<< Click to Display Table of Contents >> Creating a New NCR / ECR |
  
|
Overview:
An NCR/ECR record (or Quality Assurance record) is created in response to a quality issue or incident within the organisation. The issue may be a minor incident such as a slight fixable imperfection on a product or part to a major incident such as a faulty product that needs to be totally remanufactured. The incident is tracked throughout the process from the time it is raised/created to the issue being resolved and finalised. (NCR/ECR = Non Conformance Report/Engineering Change Report)
Quality Assurance records can be created from the following windows-
| • | Quality Management System main window |
| • | Client Details window |
| • | Supplier Details window |
| • | Employee Details window |
| • | Edit Order Book window |
| • | Edit Job Tickets window |
| • | Process Control window |
To create NCR/ECRs the user must have permission and an internal password (See Setting up Password and Permissions). The password is different to the password used to logon the iTMS. This feature automatically recognises the user when they enter their password.
Create an NCR/ECR from the Quality Management Systems module - open the Core Data module and click on the ‘Quality Management System’ icon, and then click on the ‘Add new NCR/ECR’ option.
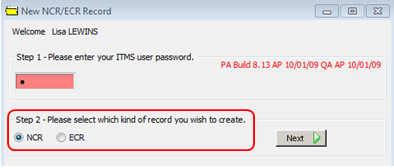
Step 1. In the 'New NCR/ECR Record' window enter your internal password and press <TAB>, then click on the Next button.

The window extends -
Step 2. Select which kind of record you wish to create, click on either the NCR or ECR radio button and then click on the Next button.
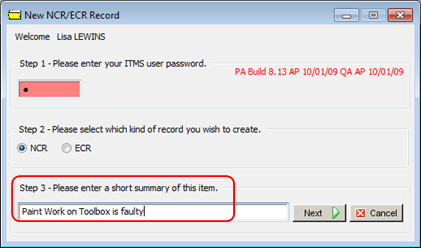
Step 3. The window will extend again - enter a summary of the item and then click on the Next button.
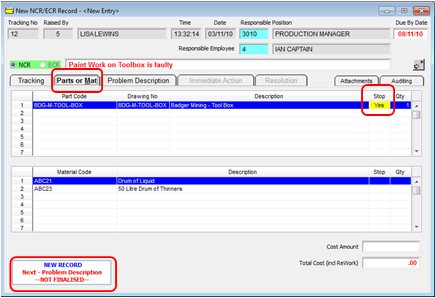
The name of the person who entered their internal password in Step 1will automatically appears in the "Raised By" field of the new entry. Click in the “Responsible Position” field, and press <F2> and select a position from the pop-up list, this is the position of the person who will be responsible to follow up /resolve the issue/item. Click OK, then enter the “Due By Date” (a date in the future that the issue will be resolved and finalised) press <TAB>. The “Responsible Employee” field will fill automatically if the Position Wizard of the QMS module has been set-up and is in use.
In the “Severity” field in the ‘Tracking Information’ section of the window, press <F2> and select a severity category from the pop-up list, click OK and press <TAB> to advance to the "Area" field. Press <F2> and select an Area category from the pop-up list, click OK, and then press <TAB> to advance to next field. Continue as above with the “Area Sub” field and the “Source” field. Press <TAB> to continue with further fields as necessary.

The “Emp Code” field is use to record the employee who is connected to the issue, that is they may have been involved or contributed to the incident/ issue/ or outcome. Please notice the status pane at the bottom left of the window.
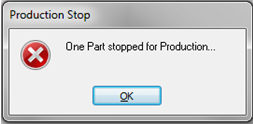
Open the "Parts or Mat" tab and enter Part and/or the Material code if necessary, press <TAB> to display details of parts/materials. If production has been stopped on part/materials due to this record, enter Yes in the “Stop” field. A pop-up message will appear when the record is saved to alert the user that production has been stopped.
Enter the quantity of affected parts/material and enter ‘Cost Amount’ if known.
Open the "Problem Description" tab and type a description of the issue in the Problem Description area and any Investigation Details in that area. In the "Date" field, enter the date and click on Confirm to finalise this step and activate the next step of the process. The “Immediate Action” tab is now accessible.
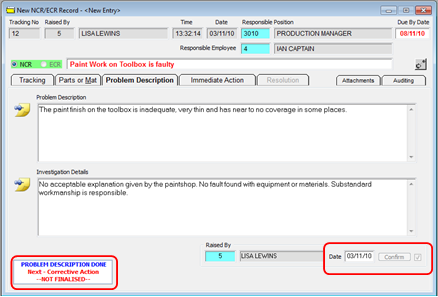
The item has been raised and is waiting to be Actioned. (See Finalise and/or Edit an NCR/ECR) Press <F9> to save.
Last Revised: 02/03/2012 SJ