|
<< Click to Display Table of Contents >> Parts - Clean up and Update |
  
|
|
<< Click to Display Table of Contents >> Parts - Clean up and Update |
  
|
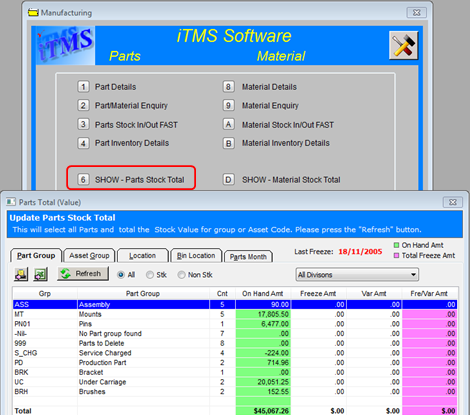
To clean up Parts in the ITMS system – open the Manufacturing module and click on ‘SHOW - Part Stock Total’. This window displays an overview of Parts in Part group, and by refreshing the other tabs the user can view the parts in Asset Group, Location or Bin Location.

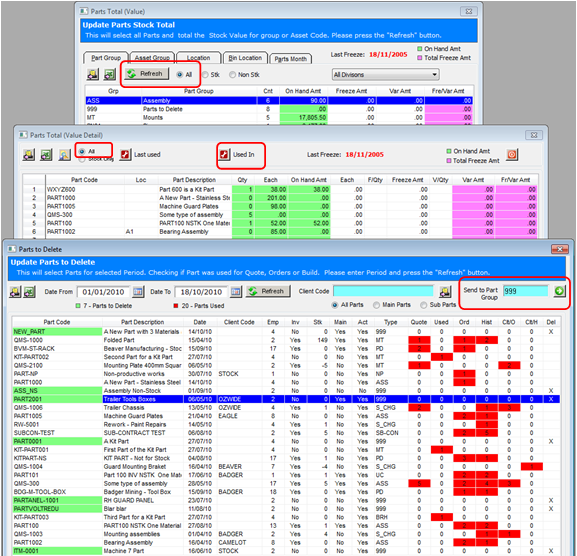
Click on the “All” radio button and then click on the Refresh button to populate the window. Allocate any Nil-group into correct Part Group by dbl-clicking on the “-Nil-“ to display the list of parts with no group. Dbl-click on each of the parts and fill the “Group” field on the Part Details window. Refresh the Parts Total window when all the parts have been allocated a group.

There are two ways of checking Parts.
| 1. | Part in the system that have not used at all. Not in build, Quotes, Jobs or Orders = ‘Used In”. |
| 2. | Part on the system and not used for a long time = ‘Last Used’. |
To update these two functions may take a while depending on the number of parts in the system, a check has to run of all production/client orders, or the last day of use for the part.
For this example the “Used In” function has been selected. Move Parts that have never been used or are no longer used into a new Part Groups called Obsolete or Parts to Delete. Dbl-click on a parts group to open the ‘Parts Total (Value Detail) window. Click on the “All” radio button and then click on the Used In button to display the ‘Parts to Delete’ window. The parts that have never been used will be highlighted in green. Click in the ‘Send to Part Group’ field press <F2> and select the ‘Parts to Delete’ parts group from the pop-up list and click on OK. Click on the Update button to send the parts to the parts group, and contact iTMS Support to delete. Click on the Refresh button to see the parts have been changed to the new group.

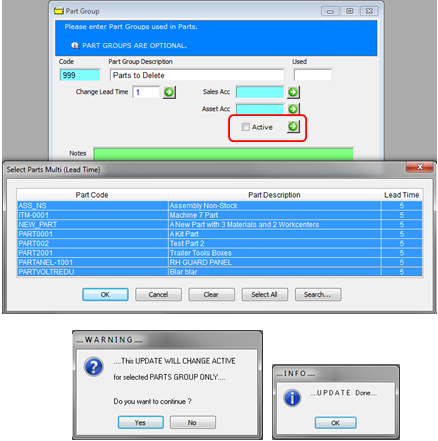
Parts moved to the ‘Obsolete’ or ‘Parts to Delete’ groups are made inactive by clicking on System Codes on the Toolbar and then click on ‘Part Groups’ from the drop-down menu to display the Part Group window. Enter the Obsolete or Parts to Delete code or press <F2> and select from the pop-up list and click OK. Press <TAB> to generate window, ensure the ‘Active’ box is NOT ticked and click on the Update button. Click on multiple parts to make inactive and click OK. Click on Yes on the Warning message and then OK on the INFO message.

The parts are now inactive.
When browsing through the individual Part groups correct groups if necessary. Ensure all Parts in a group, have the same UOM (Unit of Measure).
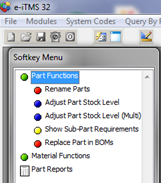
To tidy Part Codes in a group, make a common Code for each of the part groups. With the Manufacturing module open click on the Softkey from the Toolbar to display the ‘Softkey Menu’.

Dbl-click on ‘Rename Parts’ to display the Rename Codes window. For this example the Assembly Part Group has been selected. Enter the existing part codes and then in the “Replace Partial Code” fields enter the new code information. See ‘Rename Part Codes’.
Last Revised: 25/10/2010 SJ