|
<< Click to Display Table of Contents >> The Scheduling Process |
  
|
|
<< Click to Display Table of Contents >> The Scheduling Process |
  
|
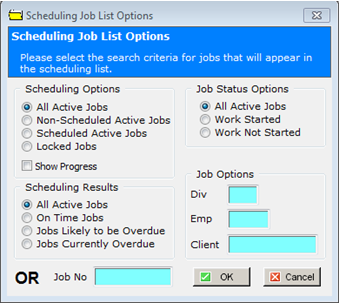
At the end of each working day, open the ‘Scheduling’ module and click on the “Run Auto Scheduling” icon to open the “Scheduling Job List Option” window and click the OK button.

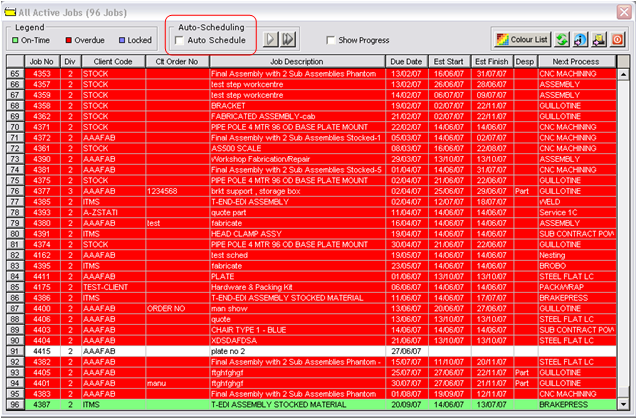
A list of jobs for scheduling will be displayed in the “All Active Jobs” window with currently scheduled jobs highlighted in either Red - meaning overdue, Green – meaning on Time, or Blue – meaning the job is locked. Jobs that have not been previously scheduled will be show in a white row.

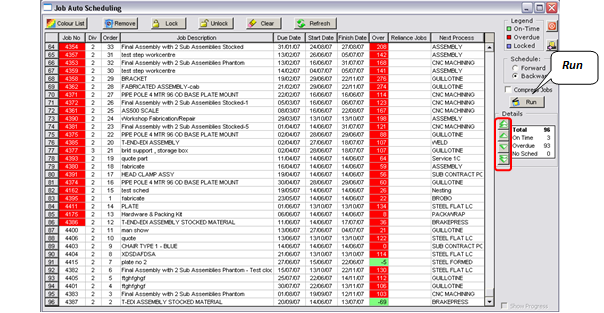
All jobs will need to be re-scheduled and by clicking on the “Auto Scheduling” box at the top of the window to tick (see above), the “Job Auto Scheduling” window will be populated. In this window, the order of the jobs can be re-arranged using the green arrow buttons on the right of the window or sorted into due date order by clicking on the column headings. When the required scheduling order has been set, click on the Run button. The scheduling process will begin and will re-schedule jobs based on available workcenter hours and other scheduling parameters.

A successful re-scheduling should show all jobs in the window with a Start Date and Finish Date. If no Start or Finish date is shown then there is incorrect or missing data in the job ticket. The panel on the right side of the window shows the Total of On-Time, Overdue and non scheduled jobs. Breakdown of individual jobs can be performed by Dbl-clicking on the job line to open the summary of the individual scheduling of each workcenter and Job ticket. To open a Gantt chart of the job, click on the icon at the top of this window as shown below.

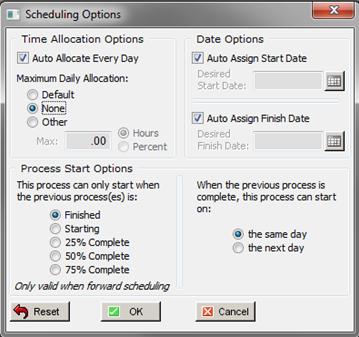
To enable more scheduling options, Dbl-click in the “Time” column of the ‘Job Scheduling’ window to display the ‘Scheduling Options’ window.

These options will change scheduling at the workcenter level only for this individual job. After changing options, click OK and then click on the Refresh button at the top of the “Job Scheduling” window. The new Gantt chart showing the re-scheduled job Start and finish times will be created. At this point the scheduled dates for this job can be “locked “so that any re-scheduling from this time on will not change the Start and Finish dates for this Job.
To Lock the job , first click on the “Lock Job” box, then click the Save button

Last Revised: 10/09/2010 SJ